
DIY Real Fossil Dig Kit


Where Do I Get Fossils For My Dig Kits?

How To Make A Real Fossil Dig Kit?
This first set of supplies and instructions is for my favorite version of the real fossil dig kit. These little dig kits come out looking awesome and are not much more work than our other options. Feel free to take a second to watch this quick video to see just how quick and easy it is to make a real fossil dig kit that looks super awesome that kids will love:
Materials:
- Sand
- Plaster of Paris
- Water
- Mixing bowl
- Wooden spoon
- Measuring cups
- Small plastic dinosaurs. I like to use different types of dinosaur toys so each dig kit comes out looking unique. My favorite things to use are some really cool dinosaur skull pencil toppers I found online. Whether you use toy dinosaurs or dinosaur skull pencil toppers, I like to give these to the students to keep as a little extra fun item to keep and enjoy.
- Pack of Model Magic - You can also use clay or playdough. I prefer the Model Magic because it is very easy to work with and you can still play with it after you remove the dig kit.
- Excavation tools. Wooden dowels and other blunt instruments work well. Sharp tools are unsafe and not necessary as the excavations are reasonably brittle and excavate easily.
- Safety goggles
- Small brush
- Fossils - If you don't have any real fossils, use little plastic dinosaurs. These are just as fun to dig up, discover, and collect!
- Container - Any plastic container will do. I really enjoy making small individual sized dig kits. 2 ounce condiment cups (the ones they put sauces in at restaurants) work great. You can also use plastic cups or Styrofoam cups. Just make sure the container is big enough for you to fit the dinosaur you will be using.
Pro tip: Take a little time online and research the fossils you are including in your Real Fossil Dig Kit. Compile the information and print it out to include with your kit. You can also find tons of free printable dinosaur facts sheets, coloring pages, and even fossil and dinosaur themed games and activities.
Subscribe to Excavating Adventures YouTube channel and enjoy our super easy and fun DIY excavation videos!

Instructions:
- Open the Model Magic and press it into the bottom of the cup.
- Press the dinosaur into the Model Magic to make an imprint.
- Carefully remove the dinosaur, making sure you have created enough of a cavity that the fossil will fit. You will also want to make sure the impression is distinct enough that it will look like a dinosaur once the dig kit dries.
- Put one cup of sand in your mixing bowl.
- Add one-third cup Plaster of Paris.
- Use the wooden spoon to mix the sand and Plaster of Paris.
- Add one-third cup of water and mix.
- Keep adding small amounts of water until you reach a pancake like batter consistency.
- Add a fossil into the dinosaur shaped cavity.
- Pour a layer of the mixture into the container to cover the fossil.
- Now add more fossils to the container.
- Cover these fossils with the mixture as well.
- Gently tap the sides of the container to remove any air bubbles. This will also allow a little mixture under the fossils.
- Optional - Once the mixture has began to set but is still slightly malleable, use a plastic dinosaur to leave little tracks in the dig kit. These tracks will be on the bottom of the dig kit once it dries, but the kids always enjoy finding them as they investigate and excavate their fossil dig kit.
- Set the Real Fossil Dig Kit in a safe location to dry undisturbed overnight. I like to put the excavation in front of a fan.
Pro tip: Look online for areas nearby to go on a fossil hunting expedition. You may be surprised at the options close by and the types of fossils you may be able to discover. Just be sure to observe any laws or regulations that may apply regarding the collecting of fossils in the area you choose to explore.
Now the Real Fossil Dig Kit is ready to be enjoyed. Find an area that is easy to clean up, distribute the safety goggles and excavation tools, and let the excavating begin.
Get ready to dig deep into the world of earth science and unearth amazing rewards with Dig Zone! As a member, you'll have access to exciting activities like challenging trivia games, immersive virtual mining experiences, and live sessions with expert guides from Excavating Adventures.
Best of all, every activity you complete earns you points that can be redeemed for free Excavating Adventures products. So why wait? Sign up today and let Dig Zone take you on an adventure that's both fun and educational!
How To Make A Simple And Easy Real Fossil Dig Kit?
If you are looking for an even faster way to make real fossil digs kits then the tutorial above then we have you covered. Simply follow the supply list and instructions above, but remove the dinosaur toys and model magic parts. Then find a cool container, make your plaster and sand mixture, add your fossils, and you are on your way to having a really awesome dig kit to share with your future paleontologist.
Pro tip: Have fun with different sized and shaped containers. There are tons of dinosaur shaped molds available online. You can also use larger containers and make mega fossil dig kits! You can also include toy dinosaurs in the dig kit. Is is really up to you and your imagination, so have fun, and your kids will certainly enjoy this easy and inexpensive dig kit you can make at home.
How To Make A Fossil Dig Kit Without Plaster?
There are a lot of ways to make a fossil dig kit without plaster, but here are a couple crazy quick and easy options.
Modeling clay - Simply hide some fossils in modeling clay and let your kids dig in and enjoy. You can also try out your artistic skills by making the clay into a dinosaur shape. For this version, I prefer to allow younger kids to enjoy this activity while the clay is still soft. You can allow the clay to air dry or even cure it in the oven but these dig kits do come out quite hard and difficult to dig. This option would be best for older kids looking for more of an excavation challenge.
Playdough - Hide some fossils in playdough and let the kids have fun discovering the treasures. Once the fossils have been found, encourage the kids to make a dinosaur with the playdough.
Kinetic sand - This is another great option that requires very little setup. Simply fill a tray or bin with kinetic sand, add fossils, and let the fun and exploration begin. This is a great activity to include some fun plastic toy dinosaurs and let their imagination run wild as they explore and enjoy this sensory activity. You can also learn how to make kinetic sand to use on your next Excavating Adventure.

Important note - Be sure to your are not putting fossilized shark teeth or other sharp specimens in kinetic sand or other excavations that will be explored with bare hands.
Another great option to make a fossil dig kit without using plaster is to create salt dough dinosaur digs. You can read and follow our simple tutorial, just swap out the little plastic dinosaurs with fossils and have fun.
Last but certainly not least, simply add some fossils to slime and let the hunt begin!

How To Make Fossil Dig Kits For Birthday Parties or Classrooms?
As we have mentioned, real fossils are an absolutely awesome way to teach and inspire students, many of which may have never seen or owned a real fossil. Buying fossil excavation kits in bulk can get expensive, but there is an easy way to send your students on a dinosaur discovery dig without a huge expense. While you can always find bags of fossils online at pretty reasonable rates, its always worth reaching out to parents to see if anyone has some fossils they could donate to the dig.
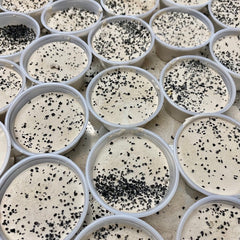
Once you have secured some fossils, you will need containers to pour your digs. I highly suggest the 2 ounce sized condiment cups we mentioned above for several reasons. First, you do not have to make so much mixture. Second, the dig kits will all be the same size to keep things equal. Third, dig kits can get heavy, especially when you are making a big batch for a classroom. Even for larger classes, the weight of a bunch of 2 oz digs remains manageable. Lastly, the 2 oz size makes for a great dig experience that does not make a giant mess. Large dig kits can result in a lot of dust and debris to clean up after all the digging is done.
Following the instructions and supply list above, simply set out a cup for each student. Equally distribute the fossils among the cups. Make a batch of mixture and fill the cups, making sure to cover the fossils.
After the digs have dried, distribute one to each student along with safety glasses and excavation tools. If there are numerous fossils in each kit, you may want to have some ziplock baggies available for students to store their fossils. It is always a good idea to label the baggies to avoid any confusion over which fossils belong to which student.
This method of making a large batch of real fossil digs kits is also perfect for dinosaur themed birthday parties for the same reasons mentioned above. These also make great party favors the kids will love!
Pro tip: Reach out to a STEM class, science lab, or workshop at your school to see if you can borrow a class set of safety glasses.
Fossil facts
Here's a list of fun facts about fossils:
-
Fossils are the remains or traces of ancient living organisms that have been preserved in rocks or sediments.
-
The study of fossils is called paleontology, which is derived from the Greek words "palaios" meaning ancient, and "logos" meaning study.
-
The oldest known fossils are stromatolites, which are structures formed by microbial communities and date back more than 3 billion years.
-
The most famous fossil is probably the Tyrannosaurus rex, which lived during the Late Cretaceous period and is one of the largest meat-eating dinosaurs that ever lived.
-
Fossils can be formed in a variety of ways, including through the process of petrification, where minerals replace the organic matter of the original organism.
-
The study of fossils has provided us with a wealth of information about the history of life on Earth, including the evolution of species, the development of ecosystems, and the impact of environmental changes on living organisms.
-
Not all fossils are bones or shells - some are footprints, burrows, or other traces left behind by ancient organisms.
-
Fossilized poop, also known as coprolites, can provide valuable information about the diet and behavior of ancient animals.
-
Some of the earliest known fossils of humans date back more than 6 million years, and provide important insights into our evolutionary history.
-
Fossils have been found on every continent, and the study of fossils has contributed greatly to our understanding of the geological history of the Earth.
These are just a few examples of fun facts about fossils, but there are many more interesting and surprising things to learn about these ancient remnants of life.
